No products in the cart.

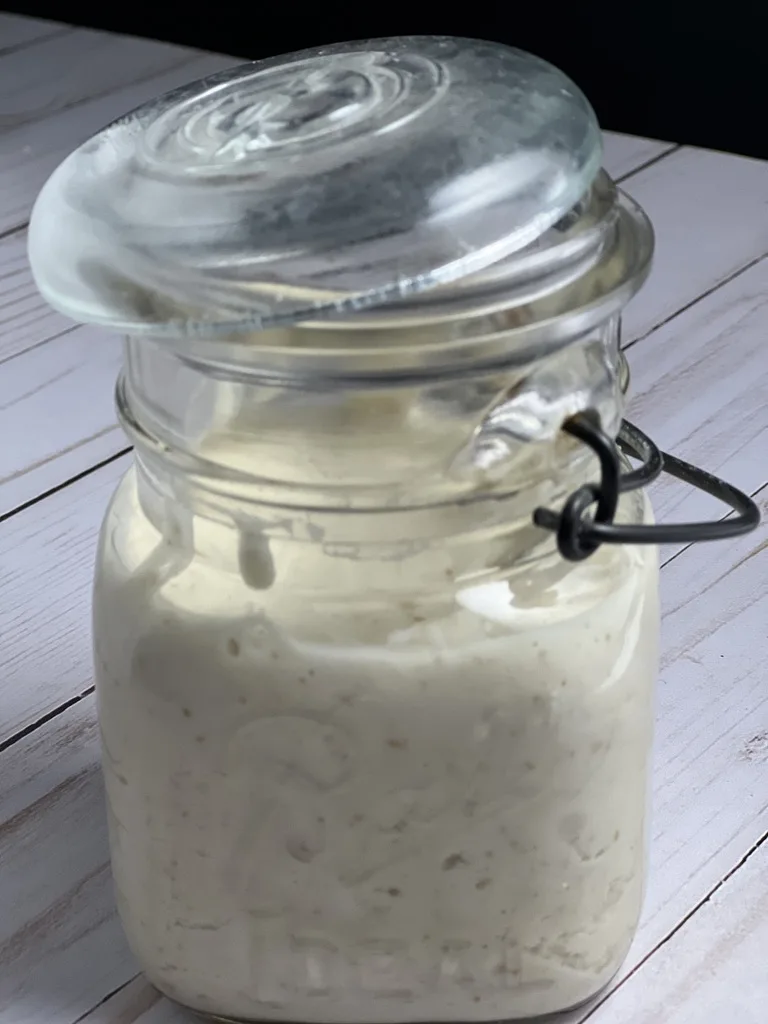
Sourdough Starter (with milk)
Last updated on October 21st, 2025
Table of contents
This Sourdough Starter with Milk combines mixing together two basic ingredients, flour and a liquid, feeding it and letting it ferment for a few days. This recipe will quickly get you started making delicious sourdough baked goods such as my sourdough rhubarb muffins since it only has a 3-5 day fermentation. This recipe is vintage inspired from my 1966 “Sunset Cook Book of Breads.”
I’ve recently tried my natural baking skills bread making and must say…nothing but love at first bake. I should have known I’d be an instant fan, as I grew up eating wholesome, homemade bread in the 80’s. Sourdough bread was popular then and now it has found it’s way back as a popular food in the 2020’s.
My vintage inspiration.
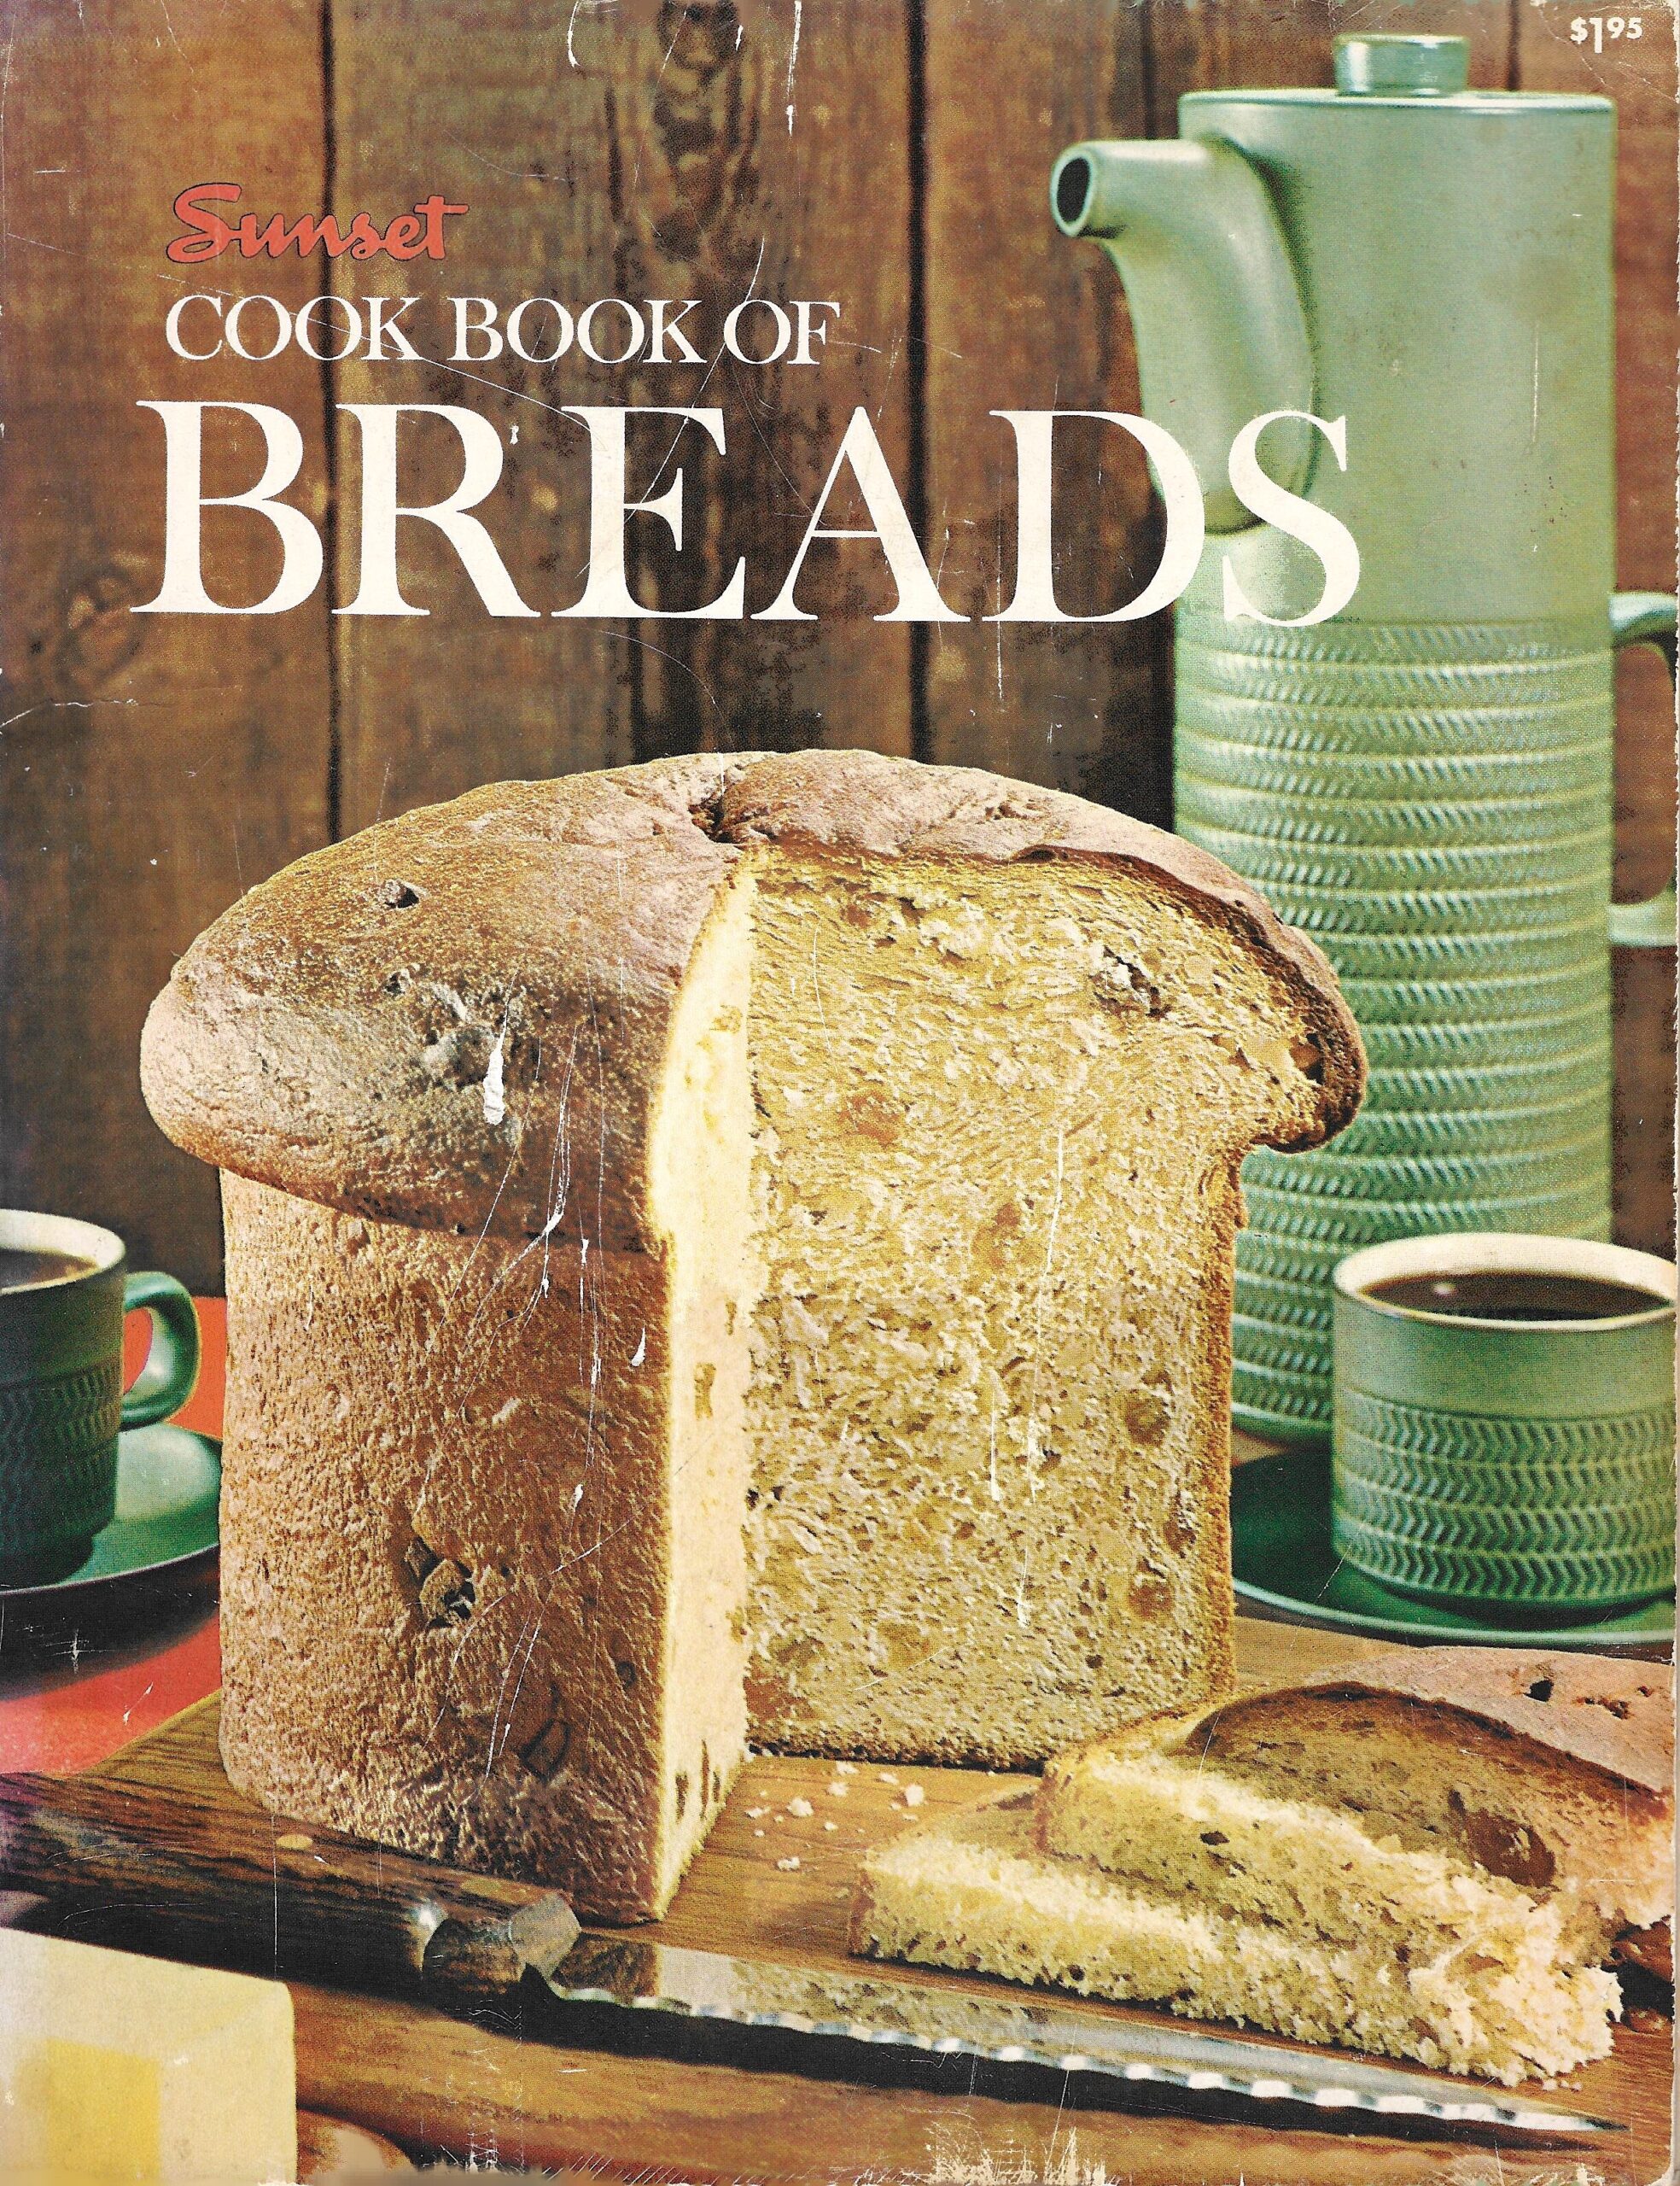
This sourdough starter recipe is from my 1966 “Sunset Cook Book of Breads” it is made using just milk and flour, and has a much shorter fermentation period. This recipe, traced to pioneers in the West and Alaska, is from a simple combination of milk and flour. For this recipe, it is best to keep at least 1 1/2 cups of this starter on hand and always feed with the same equal parts of milk and flour leaving it at room temperature until it again becomes bubbly then store in fridge.
Try the recipe also inspired by the book sourdough french bread
Ingredients to make sourdough starter using milk
- Bread flour is a type of wheat flour that has a higher protein content of 11-14% and develops more gluten to give breads, rolls and pizza crust more structure and elasticity.
- Whole Wheat Flour is made by grinding the entire wheat kernel. It has a protein content of 13-15% and is rich in fiber with a hearty, nutty flavor primarily used to make wholegrain bread and baked goods.
- Whole milk is cow’s milk that has all of its natural fat content and has a richer, creamier consistency because it has not had the cream removed.
Dietary Substitutions
For the past 12+ years, I have owned an all-natural specialty bakery converting conventional recipes to gluten free, vegan, wholesome, etc. You can read more about my pro-baking here.
I’ve put together an ultimate guide to flour to meet dietary needs like gluten free, keto, and wholesome. You can read more about them here.
To make Gluten Free
- Use a premium gluten-free flour blend like King Arthur Measure for Measure Flour.
To make Whole Grain
Use a mix of whole grain flours like whole wheat, spelt, einkorn, and dark rye. In my testing, Be sure to use whole grain flours with a higher protein content to give the starter more strength.
Strawberry Rhubarb Jam (low sugar)
This Strawberry Rhubarb Jam is made from fresh-picked sweet strawberries and tart rhubarb. It is super quick and easy to make using an electric canner. …
Storage
Countertop: Leave on countertop at least 14 days while building the starter. After that if you are not going to use everyday, move to the refrigerator with the lid sealed on. Pull out the night before you are going to use it and feed it.

Sourdough Starter (with milk)
Equipment
- 24 oz. mason jar
Ingredients
DRY INGREDIENTS
- 1 c. bread flour
- 1 T. whole wheat flour
- 1 c. whole milk (organic)
WET INGREDIENTS
Instructions
- Place flour and milk into glass jar.
- Cover with the lid partially off or cover with a or a beeswax cloth cover.
DAY 2
- Add 1 c. bread flour, 1 T. whole wheat flour, 1 c. whole milk. Feed starter 1 times in the day.
DAY 3
- Add 1 c. bread flour, 1 T. whole wheat flour, 1 c. whole milk. Feed starter 1 times in the day.
DAY 4
- Start taking out the discard. This will be 1/2 of the amount that is in the jar. Place discard in a separate mason jar and keep that in the fridge for up to 3 days.
- Feed again by adding 1/4 c. bread flour, 1 T. whole wheat flour, 1/4 c. whole milk. Feed starter 1 time during the day and keep on counter if using or in the refrigerator if only using once/week.
- Take out starter the night before you plan to use and give it a healthy feeding before baking the next day.
Notes
Leave on counter at least 10-14 days before using for bread. Some normal things you may notice: -you may notice a smell that resembles acetone, strong vinegar, alcoholic this is normal Signs that the starter needs thrown out -pink, green or blue mold
Related Recipes
Sourdough recipes
Vintage Cookbooks
Tried this recipe? Leave a comment below!
Follow us on social to see more of our cozy collection curated for nostalgic bakers who love looking at vintage cookbooks, original vintage recipes, and retro magazine clippings.
This post may contain affiliate links. As an Amazon Associate, I recommend products I like to use or suggest and may receive a small commission at no cost to you. Please see my full disclosure for more details.
This post includes original cookbook images and text excerpts shared for educational and historical purposes. All rights belong to the original publisher.
Any commentary, notes, or recipe adaptations are my own and reflect my professional baking experience in an FDA-inspected, commercial kitchen. I am not a licensed medical professional and do not provide medical advice.
All modern recipe adaptations and photography © 2025 Vintage Baked Modern LLC. Please do not copy or reproduce without permission.