

Strawberry Rhubarb Pie
Last updated on July 21st, 2026
Table of contents
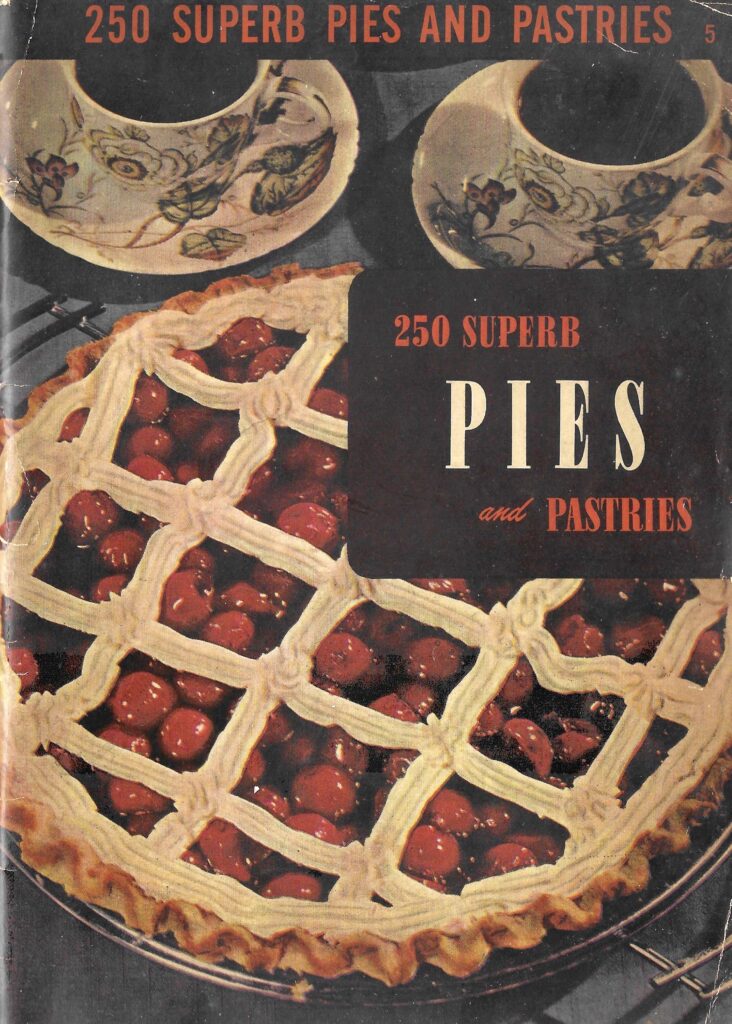
This Strawberry Rhubarb Pie combines sweet, fresh picked strawberries with tart rhubarb, nestled in a homemade flaky, buttery pie crust. My vintage inspiration for this nostalgic dessert is from my 1949 “Encyclopedia of Cooking.” The book is divided into several sections, and this berry pie recipe is featured in the “250 Superb Pies and Pastries” part. A slice of this Summer dessert is the perfect way to celebrate all the patriotic holidays like Memorial Day, Fourth of July or Labor Day.
The vintage inspiration for this homemade rhubarb strawberry pie is from a 1949 copy of “Encyclopedia of Cooking.” The book is divided into several sections, and is featured in the “250 Superb Pies and Pastries” section.
Culinary Arts Institute 250 Superb Pies and Pastries (1949), is a beloved cookbook that guides home cooks with recipes for pies, pastries and more! This vintage cookbook helps home cooks learn culinary practices from the Culinary Arts Institute with simple food.
My modern modifications to the original recipe included: using an all-butter crust, doubling the amount of berries and rhubarb in the filling, adding lemon juice and the zest in the filling, and using instant ClearJel as the thicken the filling.
Ingredients for Rhubarb Strawberry Pie
Crust
- All-purpose unbleached flour is made by grinding the seeds of the wheat plant and removing the bran and germ. It has a moderate protein content of 10-12%, making it a versatile option for baking cookies, cakes, and pastries.
- Sugar is derived from sugarcane and provides sweetness to baked goods. The most common type being granulated white sugar. Cane sugar is a natural option that is less processed with a slightly courser texture.
- Butter is made from churned cream that contains 80% butterfat. European butter is churned longer and has a higher fat content (82%-85%), which is why it yields more flavor.
- Pink salt is a type of rock salt that contains trace minerals, adding nutrients to baked goods.
- Vodka is a distilled alcoholic beverage made from grains or potatoes. Adding vodka to pie crust will give it a flaky, tender texture because the alcohol prevents the gluten from developing.
Filling
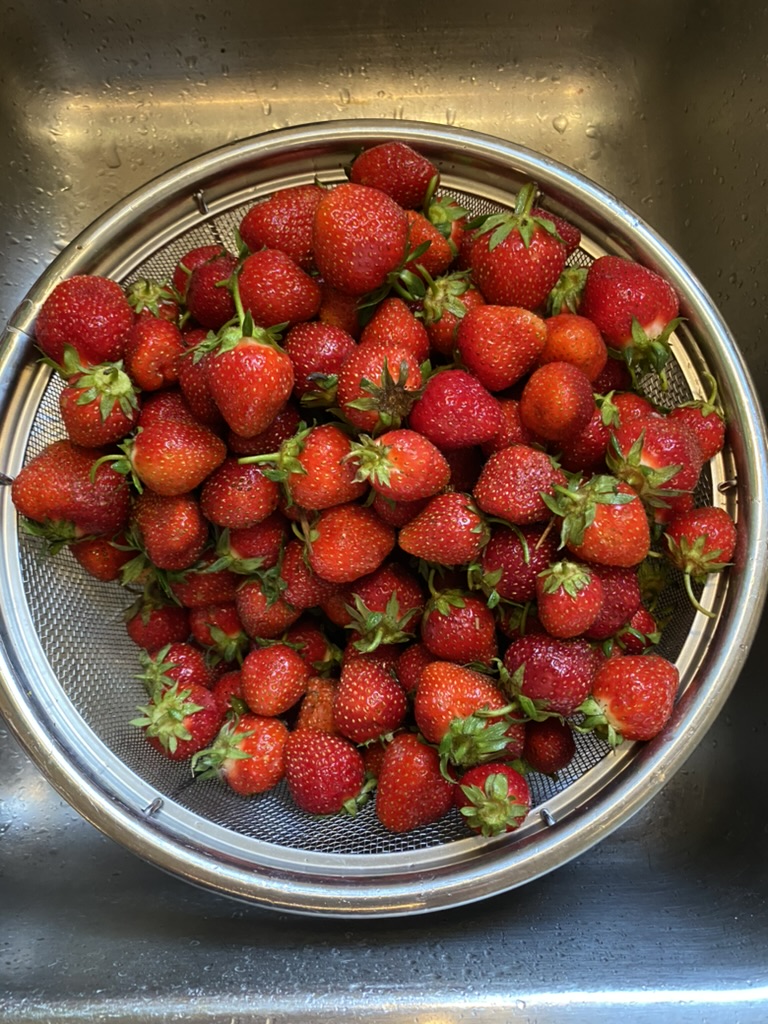
- Strawberries are a small fruit that grows on low plants near the ground, often in sandy soil and are plentiful here in the Midwest in the middle of May through late June.
- Lemons are a tart, citrus fruit that grow on trees in warm climates. Place lemons on the counter the day you plan to use them, as they will yield more juice at room temperature.
- Superfine sugar, also known as castor sugar, has a finer texture compared to granulated sugar. Its fine granules help yield tender baked goods by incorporating quickly with other ingredients. When making boiled frostings or candy, superfine sugar dissolves faster, reducing grittiness and creating a smoother texture.
- Instant ClearJel is a modified food starch used as a thickener, stabilizer, and gelling agent, used for pie fillings creating a clear, smooth texture rather than cloudy. In baked goods it helps retain moisture and produces a light, tender texture. Use cornstarch as a substitution if ClearJel is hard to find. For every 1 T. of cornstarch, use 1 1/2 T. ClearJel. For every 2 T. flour or tapioca, use 1 T. ClearJel. You can find it online here.
Homemade Whipped Cream
- Heavy Cream is a dairy product with a rich, creamy texture made from the high-fat layer that rises to the top of the milk before it is processed.
- Vanilla provides hints of caramel and spice, enhancing the depth of flavor to baked goods. Look for a high-quality, all-natural brand made from real vanilla beans containing at least 35% alcohol.
Make your own ingredients
Vanilla: Purchase Grade B vanilla beans (also called extract-grade), which have less moisture and a more concentrated flavor. Place 8 oz. of bourbon (or vodka) in glass bottle or jar. Split 5-7 vanilla beans down the middle and add to bottle. Let it sit for 3-6 months in a cool, dark place. As you use it, continue to replace the bourbon and add more beans as it keeps for many years.
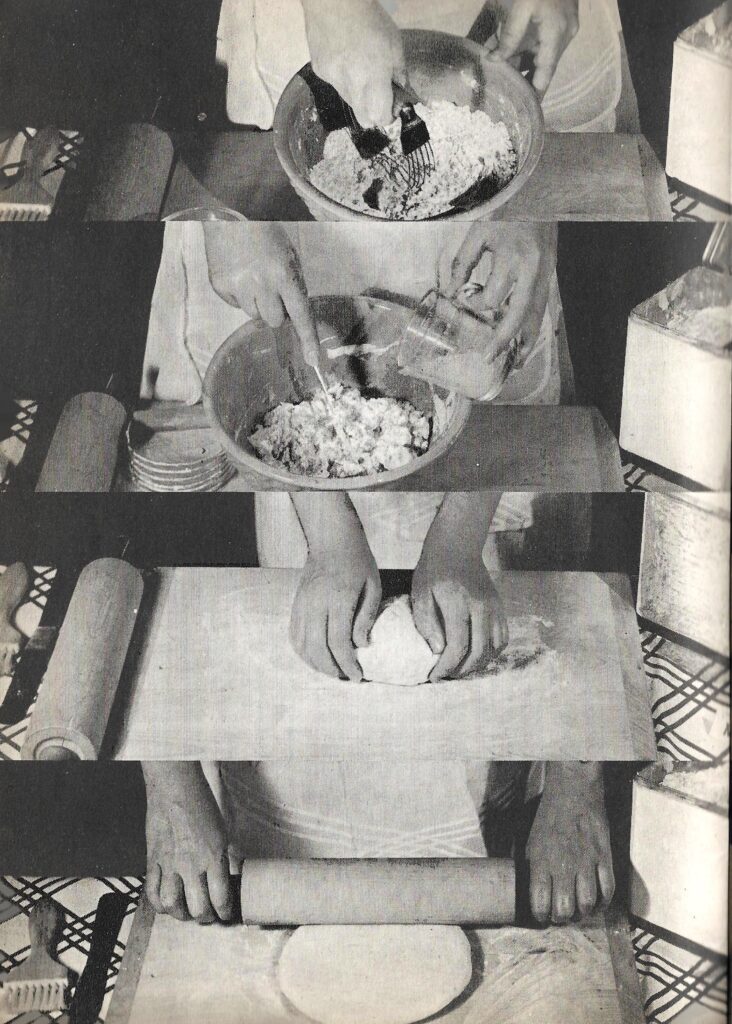
Crust
- To tenderize the crust, add vodka or white vinegar to prevent excess gluten from forming. This not only keeps the crust flaky, it also prevents shrinking during baking.
- To save time, make the pie crust ahead of time and place in refrigerator or freezer until needed.
- Work quick to keep everything cold as possible.
- Dice the butter into small cubes and put into the freezer prior to making the pie dough. Chill water with some ice cubes before using. After you roll out the crust, put in fridge for 15 minutes so it’s cold going into a hot oven. This step will help keep the crust from shrinking.
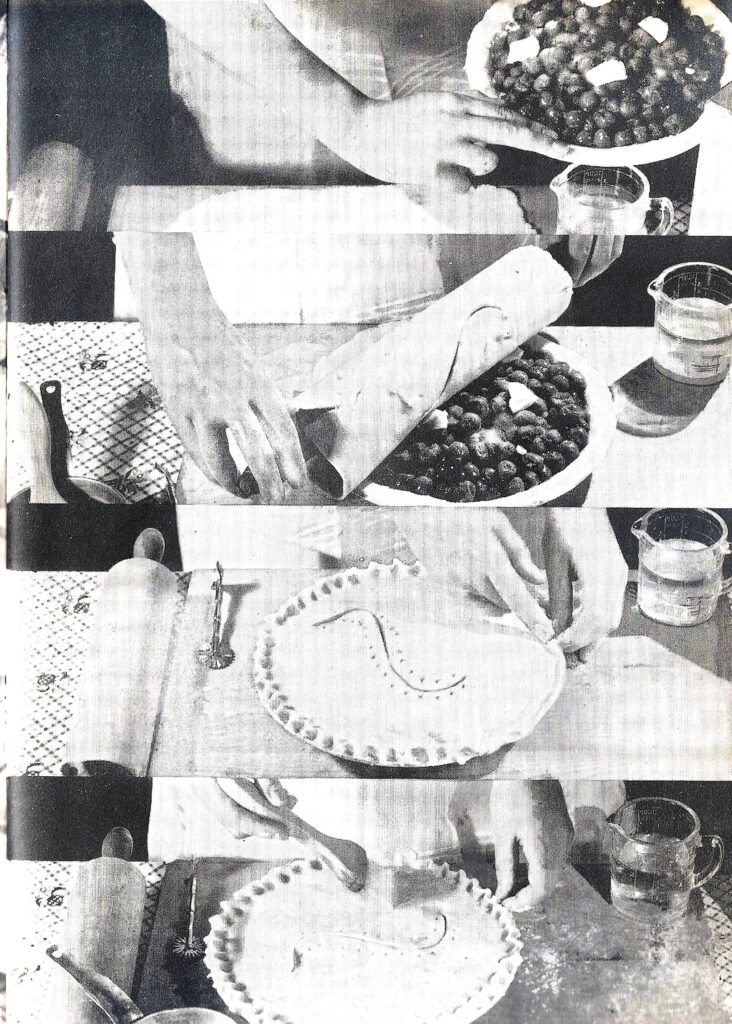
- Cover crust with pie protector or foil to make sure the filling is cooked through but that the crust doesn’t burn.
- To prevent a soggy crust, dust the raw crust with a thickening agent (cornstarch or flour) and then lightly brush with egg wash (whisk together 1 egg + 1 T. cream) before adding in the filling.
- After you dust the raw pie crust dough, prick the bottom and sides with a fork. This will help steam escape and keep the bottom of the pie flat. Another way to keep the bottom flat is to cover the crust with parchment paper and place ceramic pie weights or raw, whole beans over the parchment paper.
- Use a ceramic or glass pie plate, which conduct slow, even heat. Other types of pie plates include glass or metal. Glass will also conduct slow, even heat and also shows if the bottom crust has browned nicely. Metal pans, especially if they are dark, may brown the crust too fast, which could burn or overbake your pie.
- After you roll out the crust, place it in the fridge to chill. This will help the crust from shrinking.
FILLING
- When using frozen fruit, do not thaw before adding it to the pie filling or it can make the pie watery and mushy.
- Fresh fruit filling or pre-made filling will both work. Its easy to pre-make homemade pie filling after you pick or harvest fresh fruit in season. Follow the USDA canning procedures or store in freezer safe containers or ziploc bags.
ASSEMBLE PIE & BAKE
- To make the lattice pattern, cut strips of dough, lay down into a flag pattern on top of a piece of parchment paper. Chill until use, and lay the pattern on the top of the filling. Cut the star shapes from mini-cookie cutters.
- For a shiny, brown crust, brush the entire pie with egg wash sprinkled with course sanding sugar.
- Put the assembled pie in the fridge for about 15 minutes prior to baking to ensure the crust from shrinking.
- Cover crust with pie protector or foil to make sure the filling is cooked through but that the crust doesn’t burn.
Dietary Substitutions
For the past 12+ years, I have owned an all-natural specialty bakery converting conventional recipes to gluten free, vegan, wholesome, etc. You can read more about my pro-baking here.
Here are a few basic tips when converting conventional recipes into specialty baked goods.
- Shelf Life: Specialty baked goods tend to dry out faster and have a shorter shelf life than conventional baked goods. Store in an airtight container on counter for 1 – 2 days. For longer storage, freeze up to 6 months. Avoid refrigerating, as it can dry out baked goods.
- Let Batter Rest: Alternate flours can be dense or slightly gritty compared to white flour, so be sure to let the batter rest at least 15 minutes or overnight in the refrigerator before baking. This allows the flour to fully hydrate and produce a lighter, tender crumb.
- Oven Temperature: Alternative flours are delicate and tend to brown faster before the center is cooked through. Reduce oven to 325° and bake “low and slow,” adding a few extra minutes of bake time if needed.
Gluten-Free (no gluten)
- Flour: Swap out the flour with a premium gluten-free flour such as King Arthur Measure for Measure or use a homemade gluten-free flour blend. Be sure the flour blend contains xanthan gum or add 1/4 tsp. to 1/2 tsp. per every 1 cup of flour to the recipe.
- Hydration: Gluten free flours can make baked goods dense. Add 1 tablespoon of additional extra liquid (the same liquid called for in the recipe) to help lighten the texture.
- Fat: Add up to 1 to 2 Tbsp of additional fat, such as butter or oil to the recipe.
Vegan/Dairy Free (no animal products)
- Butter: Use unsalted vegan butter sticks such as Violife for best flavor and texture.
- Dairy: Replace dairy with unsweetened plant based milk such as oat, coconut or almond milk.
- Eggs: Replace each egg by adding 1 tsp. baking soda to the batter, then pour 1 Tbsp. white vinegar over it. Add the vinegar last though, to keep the leavening reaction.
- Fat: Add up to 1 to 2 Tbsp of additional fat like oil or vegan butter to the recipe.
Keto (low carb, high fat)
- Flour: Swap the white flour for almond flour or coconut flour.
- Sweetener: Replace sugar with Lakanto Monkfruit Sweetener which calls for a 1:1swap that mimics granulated sugar.
- Dairy: Replace dairy with unsweetened plant based milk such as coconut or almond milk.
- Hydration: Almond flour can make baked goods dense. Add 1 -2 tablespoons of additional extra liquid (the same liquid called for in the recipe) to help lighten the texture. Add 1 additional egg to help bind the batter.
- Fat: Add up to 2 Tbsp of additional fat, such as butter or oil to the recipe.
Wholesome (minimally processed)
- Flour: Swap out 1/3 to 1/2 of the white flour with King Arthur white whole wheat flour or King Arthur 100% whole wheat flour or Bob’s oat flour.
- Sweetener: Replace white sugar with maple syrup or honey. Use 3/4 c. honey for every 1 c. sugar. You can also swap out the white sugar with 1:1 swap using natural cane sugar, coconut sugar or date sugar.
- Dairy: Replace dairy with unsweetened plant based milk such as oat, coconut or almond milk.
- Lower Fat: For every 1 c. of butter, use 3/4 c. heart-healthy oil (like canola or extra-light olive) OR 1/2 c. unsweetened applesauce + 1/2 c. oil.
Allergen Free (none of the 9 allergens)
- Flour: Swap out the flour with a premium gluten-free flour such as King Arthur Measure for Measure or use a homemade gluten-free flour blend that does not contain tree nuts or soy. Be sure the flour blend contains xanthan gum or add 1/4 tsp. to 1/2 tsp. per every 1 cup of flour to the recipe. Here is a list of some other gluten-free flours to try.
- Butter: Use unsalted vegan butter sticks such as Violife for best flavor and texture. Add up to 1 to 2 Tbsp of additional fat like oil or vegan butter to the recipe.
- Dairy: Replace dairy with unsweetened plant based milk such as oat or coconut milk. Check the labels to make sure they are soy-free and nut-free.
- Eggs: Replace each egg by adding 1 tsp. baking soda to the batter, then pour 1 Tbsp. white vinegar over it. Add the vinegar last though, to keep the leavening reaction.
- Nuts: Omit all peanuts and tree nuts (almonds, brazil nuts, cashews, hazelnuts, macadamia nuts, pecans, pine nuts, pistachios, or walnuts.
How to pick and preserve fresh-picked strawberries
- It is best to strawberries early in the morning before the bugs are active and to avoid the sun and heat.
- Be sure to wear a hat for shade, and lots of bug spray!
- Make sure you clean out the back of your car to have plenty of room for the strawberry flats to fit in your trunk or back seat of your car.
- Most strawberry pie recipes call for either a pint, quart or pound of strawberries. Fresh picked strawberries are sold this way as well, by the quart, pound or flat (8 quarts). Both one quart and one pound equals about 4 cups of sliced berries, one pint equals about 2 cups.
- If you are using the berries the same day, lightly spray with water to remove the gritty sand and pat dry with paper towel. Use a small, round fruit huller to remove tops and slice berries.
- If you are not planning to use them right away, place berries in an air-tight container and keep in the fridge for up to 1 week. Then clean and prep them as needed, otherwise they may turn mushy.
- To freeze the berries for long-term storage, remove stems and then put the berries out onto a single layer or slice into halves or quarters. Place on a 1/2 sheet pan lined with parchment paper. Freeze for 1 hour and then place them into ziploc bags or vacuum seal them for up to 1 year. You can also just put the bags of cherries straight into the freezer, but they may clump together from the juice. Another option is to freeze berries by placing on a 1/2 sheet pan lined with parchment paper. Spread in a single layer and freeze for 1 hour. Place berries in ziploc bags or vacuum seal them for up to 8-10 months.
Storage & Freezing
Baked Pie: After the pie is baked, cover pie and leave on counter up to 3 days. You can also freeze a pie that has been baked up to 6 months.
Unbaked Pie: Cover pie with saran wrap or foil. Place covered pie in a freezer-safe container up to 6 months. Bake pie straight from freezer and add additional baking time as needed.

Strawberry Rhubarb Pie
Ingredients
CRUST
- 2 c. unbleached flour
- 1 ½ tsp. sugar
- 1 tsp. salt
- 12 T. butter cold & diced into cubes
- 4-5 T. ice cold water
- 1 T. vodka lemon juice or white vinegar
PIE FILLING
- 4 c. sliced strawberries
- 3 c. diced rhubarb
- 1 ¼ c. sugar
- 2 T. instant ClearJel or cornstarch
- 1 T. lemon juice
- 1 T. lemon zest
- 2 T. diced butter
EGG WASH
- 1 egg
- 1 T. heavy cream
Instructions
PREP
- Zest and juice 1 lemon. Prep strawberries and rhubarb and set aside.
- Place ice cubes in glass of water and set aside. Dice up butter into small cubes and put in freezer until making the crust.
CRUST
- Place flour, sugar, and salt into food processor. Add cold butter, water, and vodka and pulse just until the dough comes together (crumbly).
- Pour out the crust onto a piece of saran wrap and shape into round disk. Cut into half and place in refrigerator for 15 minutes up to overnight.
- Remove from fridge and roll out dough between 2 sheets of parchment paper. Shape into round disk with enough to hang 1” over your pie pan. Do this process again with the other disk. Refrigerate 10-20 minutes if using right away or overnight.
- Use one disk for the bottom crust. Place in pie pan, crimp and trim edges. Dust bottom of crust with thickening agent (clear jel or tapioca) and then brush lightly with egg wash, and pierce pie shell with fork.
- For the top crust use a pastry cutter to cut into 10 (1") strips. Place strips on a baking sheet lined with parchment paper and put back in fridge until ready to use.
- Use up leftover dough and cut out decorative shapes with pie cutters or mini cookie cutters and place in fridge until ready to assemble pie.
PIE FILLING
- Place rhubarb, water, sugar, instant ClearJel in heavy duty pan. Cook 5 minutes. Remove from burner and add in berries, lemon juice, lemon zest and stir until incorporated.
- Pour filling into crust, top with diced butter and place the pre-cut pastry strips into a lattice pattern on top of the filling. Brush lattice and decorative shapes with egg wash and sprinkle with course sanding sugar. Place assembled pie in fridge to chill for 10 minutes.
BAKE
- Bake pie at 400° for 15 minutes. Reduce oven to 375°, cover edges with foil or pie protector and bake an additional 45-50 minutes. Watch to see when pie starts to bubble, then let it bake 5 more minutes.
Related Recipes
More Pie Recipes
1940’s Vintage Cookbooks
Leave a comment below and let me know how it turned out for you!
FOLLOW US ON SOCIAL! Stay connected with us for more vintage recipes baked modern!
This post may contain affiliate links, which means we may receive a commission, at no cost to you, if you make a purchase through a link. Please see our full disclosure for further information.