
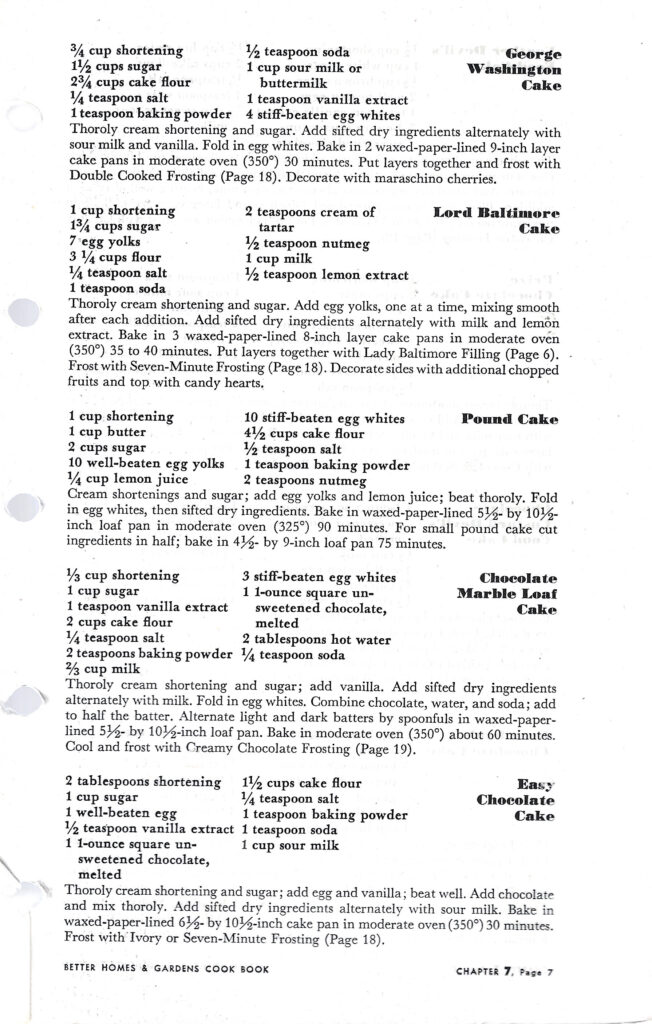
Lord Baltimore Cake
Last updated on October 21st, 2025
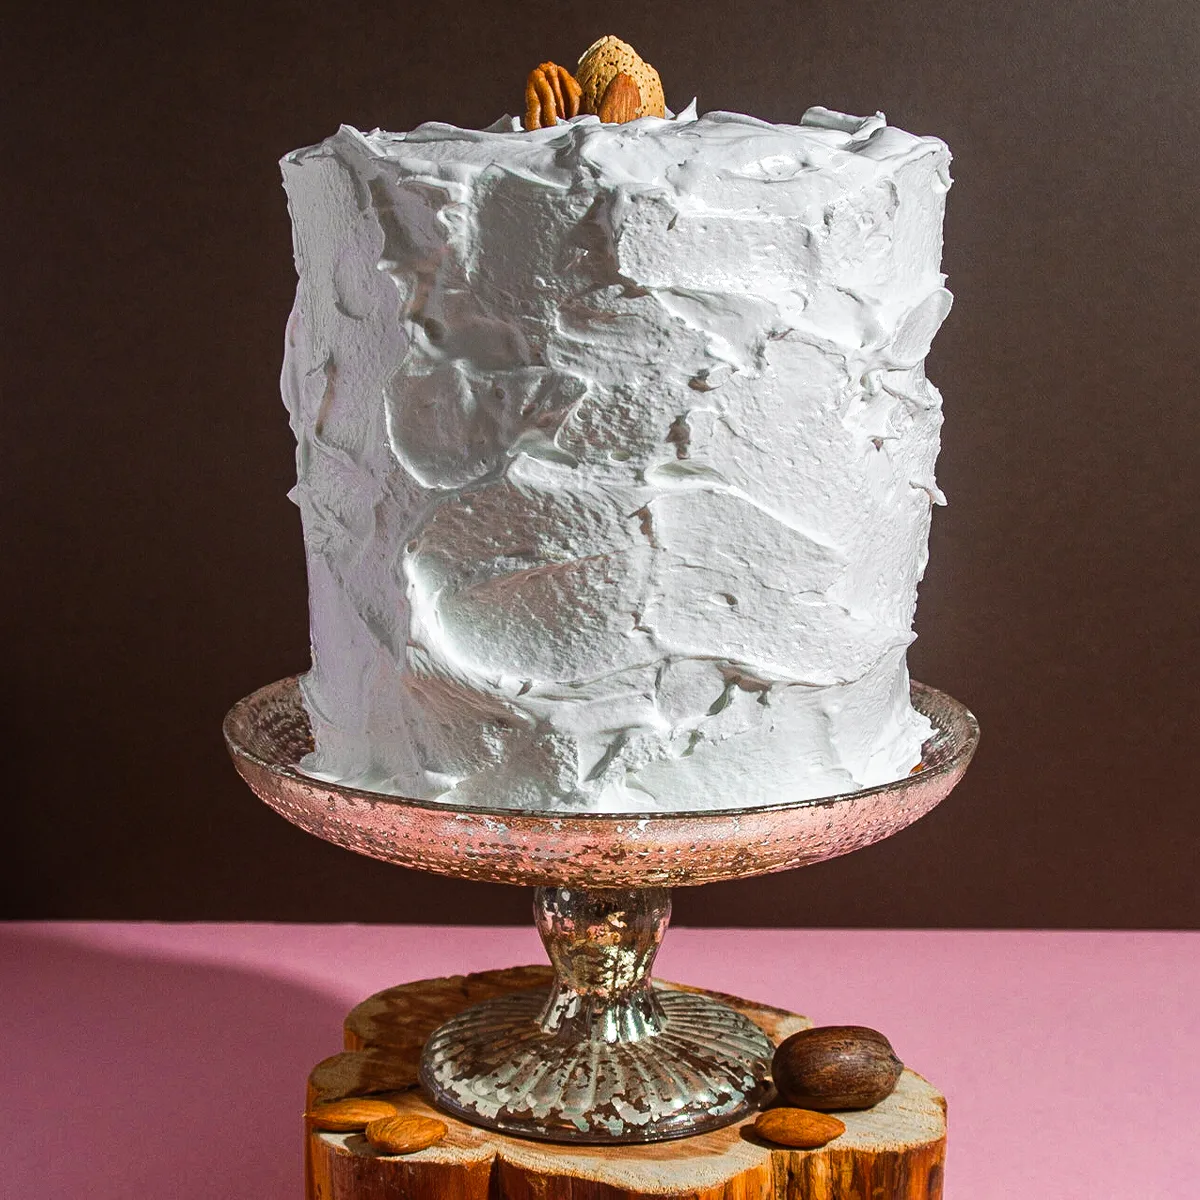
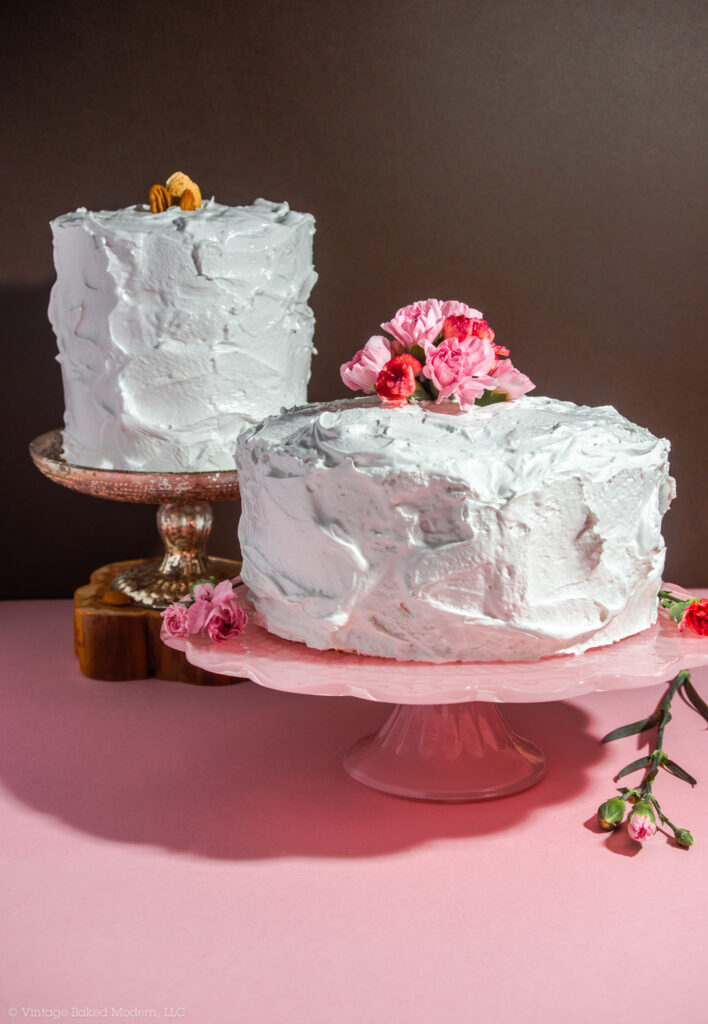
The Lord Baltimore Cake is a classic vintage dessert made of a tender three-layer white cake filled with a rich macaroon cookie and nut filling, and frosted with a fluffy seven-minute frosting. This cake should be considered more of a “project” weekend cake as it requires a lot of ingredients and more than time than a simple weeknight sheet cake.
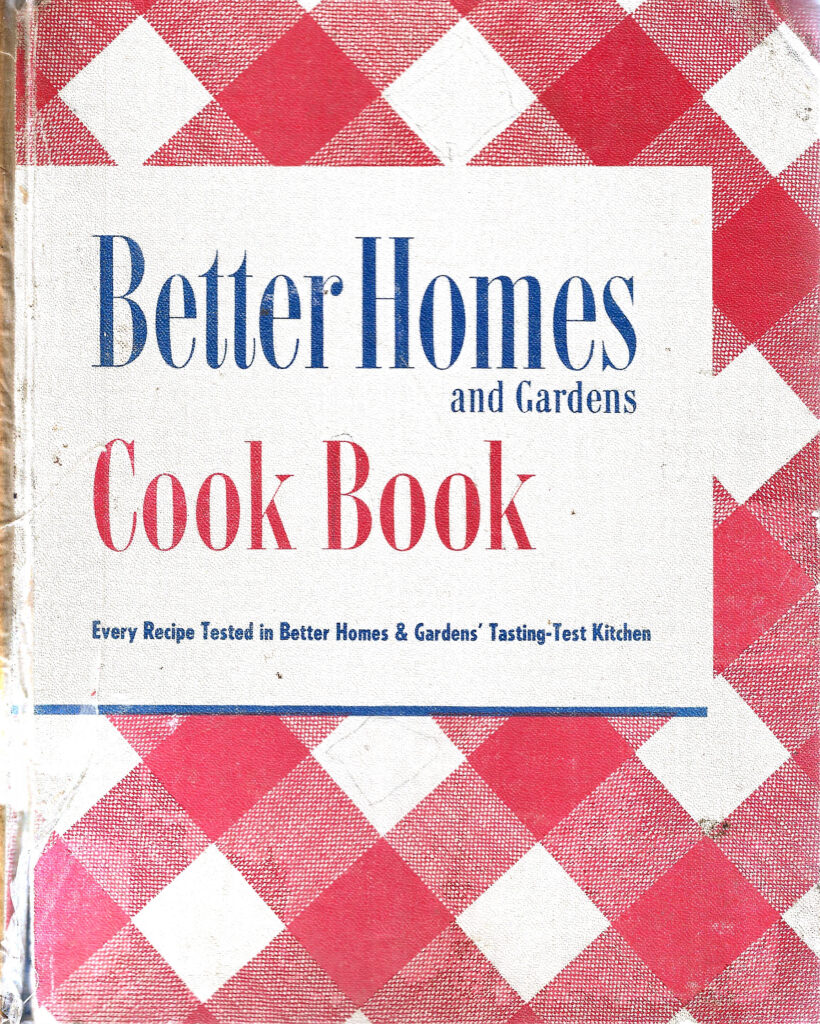
The inspiration for Classic Lady Baltimore Cake comes from my copy of the 1941 Better Homes & Garden Cook Book which appears in a full-color illustration among other vintage cakes like the Lord Baltimore Cake, Dolly Madison Cake, and George Washington Cake. While I dream for the day to have all six cakes completed on the same day to take a photo like this, finishing all the steps involved for just one of these cakes takes a good bit of time. I tend to think of this dessert as a “project” cake.
How I baked it modern: used butter instead of shortening to add flavor and richness, added oil in addition to the butter, for added moisture, added more salt as our modern palettes are accustomed to, added vanilla for more flavor, made homemade coconut macaroon cookies for the filling, added cornstarch to make a tender cake texture, used buttermilk for a light texture and tangy flavor.
Lord Baltimore Cake History
The Lord Baltimore Cake is a variation of the Lady Baltimore Cake, both dating back to the early 1900’s. Surprisingly neither of the two cakes originated in Baltimore. The key difference between a Lord Baltimore Cake and a Lady Baltimore Cake comes down to the incorporation of the eggs and the ingredients in the filling. Lady Baltimore has egg whites which makes for a lighter texture and has a dried fruit and pecan filling. The Lord Baltimore recipe has a little bit of nutmeg and uses just egg yolks which yields a richer crumb. It has a rich filling made of crushed macaroon cookies, nuts (walnuts and almonds), and candied cherries.
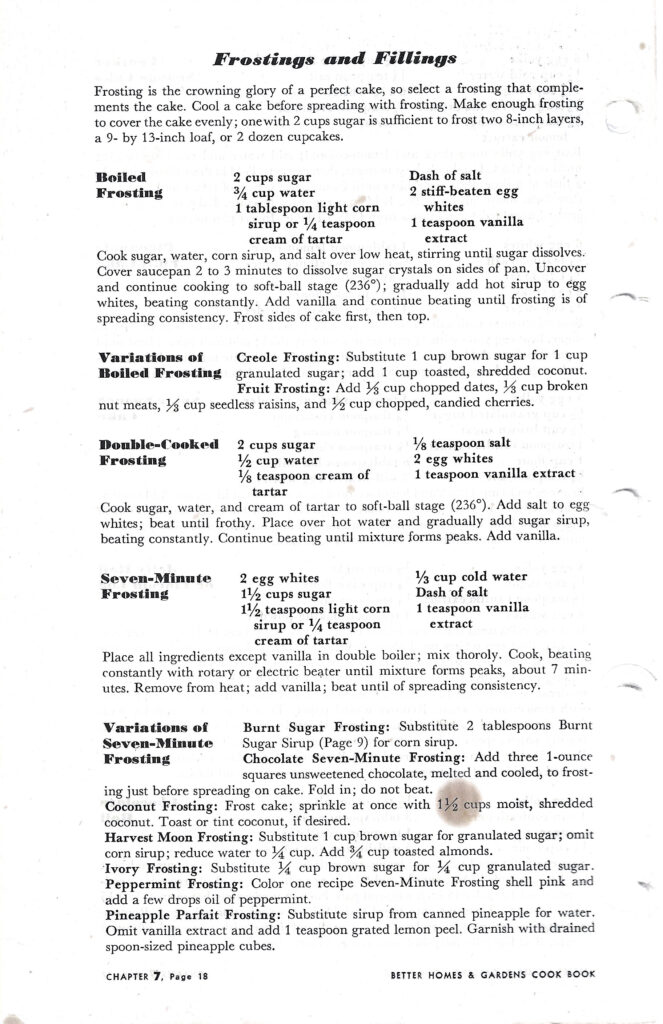
Better Homes & Gardens Cookbook (1941)


Try these recipes inspired by the book Lady Baltimore Cake, or Washington Cake
250 Classic Cake Recipes (1952)


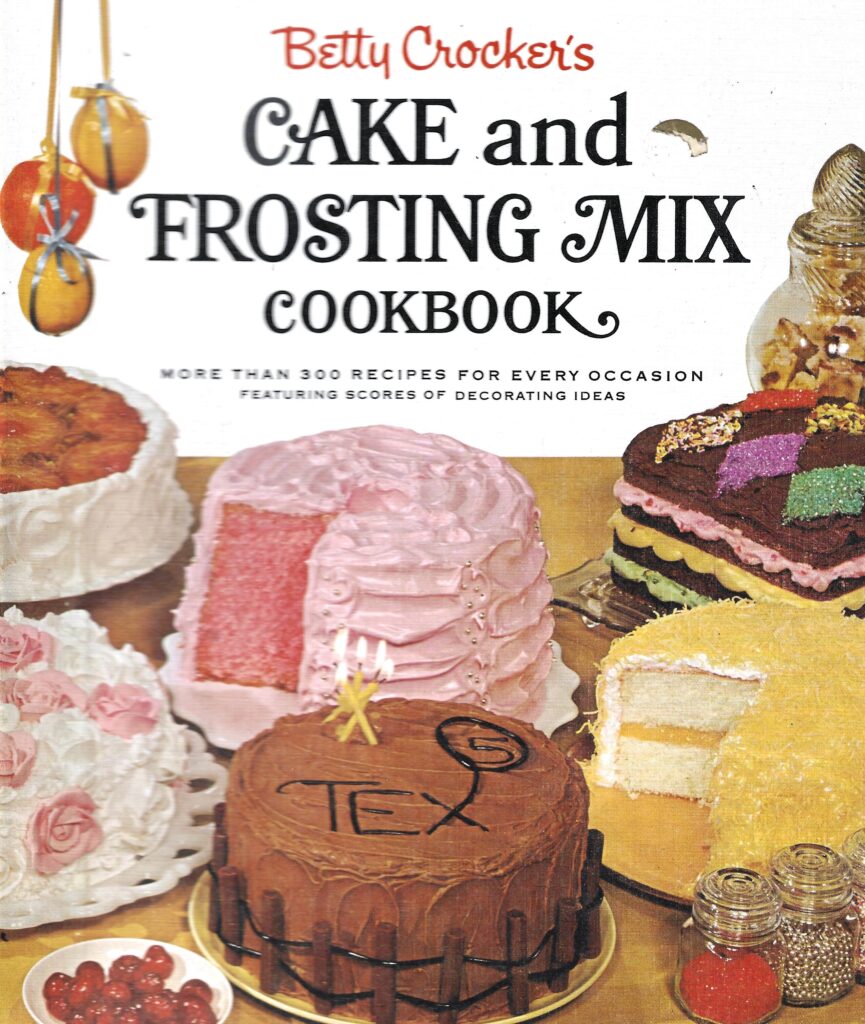
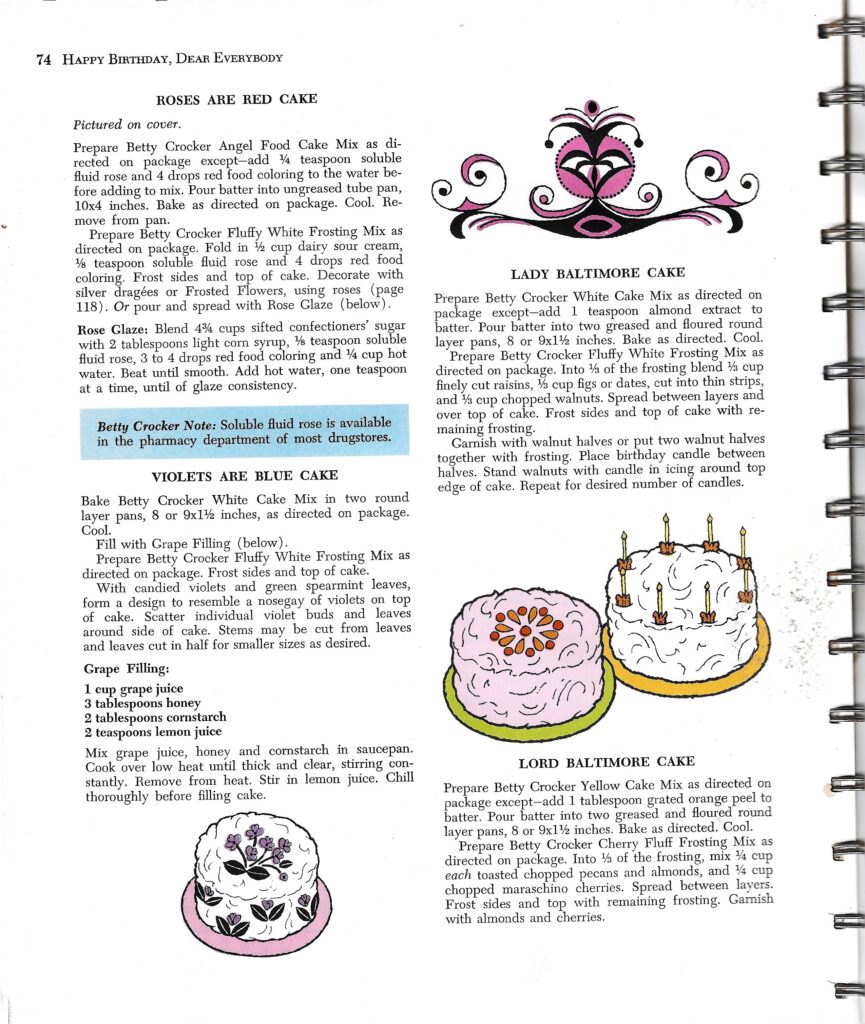
Betty Crocker’s Cake & Frosting Mix Cookbook (1966)
Dry Ingredients
- All-purpose unbleached flour is made from ground wheat kernels with the bran and germ removed. It has a moderate protein content of 10-12%, making it a versatile option for most baked goods.
- Cornstarch is made from the starchy center of dried corn kernels used as a thickener in sauces and pie fillings, and in baked goods to create a light, tender crumb.
- Baking soda (sodium bicarbonate) is a leavening agent that, when combined with an acid (like lemon juice, buttermilk, or vinegar) creates carbon dioxide gas to make baked goods rise.
- Baking powder is a leavening agent that contains both an acid, like cream of tarter, and a base, like baking soda to help baked goods rise. Use a double-acting aluminum-free baking powder to avoid a bitter aftertaste.
- Pink salt is a type of rock salt found near the Himalayas, that is minimally processed and contains trace minerals.
- Nutmeg is a warm spice that originates from nutmeg trees in the Spice Islands. It is available as whole nutmeg which can be freshly grated or pre-ground. Good quality spices such as Penzey’s or Frontier Organics will make a difference in flavor in your baked goods.
Wet Ingredients
- Butter is made from churned cream that contains 80% butterfat. European butter is churned longer and has a higher fat content (82%-85%), which is why it yields more flavor.
- Sugar is a made by processing the juice of the sugarcane plant. Cane sugar is a natural option that is less processed with a slightly courser texture.
- Canola oil is a type of vegetable oil made from the seeds of canola plant. It’s low in saturated fat.has a neutral, light flavor that gives baked goods tender texture.
- Buttermilk is a cultured dairy product that adds a tangy flavor and creates tenderness in baked goods. When purchasing buttermilk, look for simple, natural ingredients such as “cultured milk”.
- Eggs are produced by female chickens and are important in baking because their proteins provide structure, they act as a natural leaving agent by trapping air that expands during baking.
- Vanilla provides hints of caramel and spice, enhancing the depth of flavor to baked goods. The best quality is an all-natural and made from real vanilla beans containing at least 35% alcohol.
- Oranges are a citrus fruit that add a bright, zesty flavor to savory and sweet foods. Before squeezing the juice, zest the peel with a microplane tool and add it to baked goods for zingy flavor.
Make Your Own Ingredients
Vanilla: Purchase Grade B vanilla beans (also called extract-grade), which have less moisture and a more concentrated flavor. Place 8 oz. of bourbon (or vodka) in glass bottle or jar. Split 5-7 vanilla beans down the middle and add to bottle. Let it sit for 3-6 months in a cool, dark place. As you use it, continue to replace the bourbon and add more beans as it keeps for many years.
Buttermilk: Add 1 T. vinegar or lemon juice into a liquid measuring cup and add cream or whole milk until it reaches the 1 c. measure line and let it sit for a few minutes before use.
How to make the cake filling
The ingredients for the cake filling vary among vintage recipes, but it typically includes coconut macaroon crumbles, candied cherries and chopped nuts (like pecans, walnuts or almonds), and both orange and lemon flavor. For the coconut macaroon crumbles, I made these Homemade Coconut Macaroon cookies and crumbled them up. They tasted delicious on their own, so I knew they would lend a toasted coconut flavor to the filling.

- For easy release from bundt pans, spray the pan well with a oil spray dusted lightly with flour. You can also make a Baker’s GOOP by mixing together 1 c. of flour and 1 c. of neutral oil (like extra light olive oil) or canola oil. Keep this on-hand for up to 3 months.
- To help retain moisture in your cakes, after taking them out from the oven, cover with an upside down baking sheet. Let them cool for about 5 minutes. Run a knife around the edges and turn the cake out onto a piece of parchment paper. Then wrap right away in saran wrap.
- Keep decorating simple and natural, like using the ingredients featured in the cake.
How to make Seven-Minute Frosting
I found that Seven-minute Frosting was often referred to as divinity frosting or sometimes called Tutti-Fruitti Frosting. Reason being that once the fruity nut filling was added to it, it tasted just like divinity candy. Many people find seven-minute frosting tricky to make especially if it is humid out. Older recipes call for corn syrup or cream of tarter. I add both cream of tarter and cornstarch to help stabilize the frosting. Old-fashioned recipes suggest that you beat the frosting the entire time over the stove with a hand mixer. It is really much easier though to use the stand mixer.

How to assemble the cake
After you make the frosting, take out 1/2 to add to it the filling. Put the first cake layer down on cake plate and place some parchment paper along the sides to keep the plate clean. Use an off-set spatula and spread filling on the first layer. Place on the second layer and spread on filling. Place on the last layer (upside down) so you have a nice flat top layer to frost. Cover top with remaining filling and push down onto to the sides of the cake. To decorate, keep it simple by placing whole ingredients that were featured in the filling, such as nuts, candied cherries or shredded coconut over the cake.
Dietary Substitutions
For the past 12+ years, I have owned an all-natural specialty bakery converting conventional recipes to gluten free, vegan, wholesome, etc. You can read more about my pro-baking here.
Here are a few basic tips when converting conventional recipes into specialty baked goods.
- Shelf Life: Specialty baked goods tend to dry out faster and have a shorter shelf life than conventional baked goods. Store in an airtight container on counter for 1 – 2 days. For longer storage, freeze up to 6 months. Avoid refrigerating, as it can dry out baked goods.
- Let Batter Rest: Alternate flours can be dense or slightly gritty compared to white flour, so be sure to let the batter rest at least 15 minutes or overnight in the refrigerator before baking. This allows the flour to fully hydrate and produce a lighter, tender crumb.
- Oven Temperature: Alternative flours are delicate and tend to brown faster before the center is cooked through. Reduce oven to 325° and bake “low and slow,” adding a few extra minutes of bake time if needed.
- Alternative Flours: Try using alternative flours in your baking..here is a reference I put together of Ultimate Guide to Flours.
Gluten-Free (no gluten)
- Flour: Swap out the flour with a premium gluten-free flour or a homemade gluten-free flour blend. Be sure the flour blend contains xanthan gum or add 1/4 tsp. to 1/2 tsp. per every 1 cup of flour to the recipe.
- Hydration: Gluten free flours can make baked goods dense. Add 1 tablespoon of additional extra liquid (the same liquid called for in the recipe) to help lighten the texture.
- Fat: Add up to 1 to 2 Tbsp of additional fat, such as butter or oil to the recipe.
Vegan/Dairy Free (no animal products)
- Butter: Use unsalted vegan butter sticks such as Violife for best flavor and texture.
- Dairy: Replace dairy with unsweetened plant based milk such as oat, coconut or almond milk.
- Eggs: Replace each egg by adding 1 tsp. baking soda to the batter, then pour 1 Tbsp. white vinegar over it. Add the vinegar last though, to keep the leavening reaction.
- Fat: Add up to 1 to 2 Tbsp of additional fat like oil or vegan butter to the recipe.
Wholesome (minimally processed)
- Flour: Swap out 1/3 to 1/2 of the white flour with King Arthur white whole wheat flour or King Arthur 100% whole wheat flour or Bob’s oat flour.
- Sweetener: Replace white sugar with maple syrup or honey. Use 3/4 c. honey for every 1 c. sugar. You can also swap out the white sugar with 1:1 swap using natural cane sugar, coconut sugar or date sugar.
- Dairy: Replace dairy with unsweetened plant based milk such as oat, coconut or almond milk.
- Lower Fat: For every 1 c. of butter, use 3/4 c. heart-healthy oil (like canola or extra-light olive) OR 1/2 c. unsweetened applesauce + 1/2 c. oil.
FAQ’s
If Baked: Cover in air-tight container and leave on counter up to 3 days. To freeze, cover in saran wrap and place in freezer-safe container up to 6 months. Thaw on counter in the container for 1/2 hour before opening up the container.
Unbaked Batter: Prepare batter and place in a sealed container up to 3-5 days in refrigerator.
When baking cakes, it is important to always use a light colored, aluminum cake pan since they conduct even heat. Dark pans can make your baked goods darken fast around the edges before the middle is fully done.

Lord Baltimore Cake
Equipment
- 8" cake pan
Ingredients
DRY INGREDIENTS
- 2 ⅔ c. unbleached flour
- 2 T. cornstarch
- 2 tsp. baking powder
- ½ tsp. baking soda
- ½ tsp. nutmeg
- 1 tsp. salt
WET INGREDIENTS
- ¾ c. unsalted butter room temp
- ¼ c. oil
- 1 ⅔ c. sugar
- 7 egg yolks
- 1 c. buttermilk or milk
- 1 T. orange zest
- 1 ½ tsp. vanilla
FILLING
- ½ c. macaroon crumbs crushed
- ¼ c. blanched almonds finely chopped
- ¼ c. pecans or walnuts finely chopped
- ¼ c. cherries (candied) finely chopped
- ¼ tsp. orange extract
- 1 T. orange juice
SEVEN MINUTE FROSTING
- 3 egg whites
- 1 ½ c. superfine sugar
- ⅓ c. water
- 1 T. cornstarch or unflavored gelatin
- ½ tsp. cream of tarter
- 2 tsp. vanilla
- pinch salt
HOMEMADE MACAROON COOKIES
- 2 egg whites
- ½ c. sugar
- 1 ½ c. unsweetened coconut shredded
- 1 ½ c. sweetened coconut shredded
- ¼ tsp. cream of tartar
- 1 tsp. vanilla
- ¼ tsp. almond extract
- pinch salt
Instructions
PREP
- Preheat oven to 350° Grease (3) 8" round cake pans.
- Separate out 7 egg yolks and reserve (2) egg whites to use in the macaroon cookies and frosting and (3) egg whites to use in the 7-minute frosting.
- Whisk together dry ingredients in a separate bowl.
CAKE
- Cream together butter and sugar. Add in egg yolks, vanilla, and orange zest and beat together until light and fluffy.
- Add in dry ingredients and mix until just combined.
- Pour in buttermilk and mix until just combined.
- Pour 1/3 of the batter into each of the (3) greased cake pans. Bake for 25-28 minutes. Place toothpick in center comes out clean. Allow the cakes to cool before frosting them.
- Release cake from sides of pan with an off-set spatula. Turn cakes out onto parchment paper or cooling rack. Wrap in plastic wrap until cake assembly to retail the moisture.
MACAROON COOKIES
- For the cookies: Line baking sheet with parchment paper or Silpat baking mat.
- Beat egg whites, sugar, and cream of tartar together until foamy.
- Add in coconut, vanilla, almond extract, and salt and mix until combined.
- Use medium cookie scoop and place 12 cookies on baking sheet.
- Bake at 325° for 20-23 minutes until coconut tips look toasted, but not dark.
FILLING
- Make or purchase macaroon cookies. Crush cookies for filling and place in a bowl.
- Finely chop walnuts or almonds and candied cherries and add to bowl.
- Zest orange and add to bowl and mix together.
FROSTING
- Over double broiler with the bowl from stand mixer place egg whites, sugar, water, cornstarch, cream of tarter, and salt. Whisk for about 5 minutes until all the sugar is dissolved and not gritty.
- Move bowl to stand mixer and add vanilla. Beat on high until glossy with stiff peaks form, about another 3-4 minutes.
- Place on cake right away or store covered until use. Frosting will crust once applied to cake, so be sure to cover with a glass cake stand or just cover with plastic wrap.
ASSEMBLE CAKE
- Take out 1/2 of the 7-minute frosting and add it to the filling mixture. The remaining 1/2 of frosting will be used to frost the cake.
- Put bottom layer of cake onto cake plate. Place wax or parchment paper around edges of cake in order to frost neatly.
- Place 1/3 of the filling on top of the first layer and spread with off-set spatula.
- Place middle layer on the cake. Place filling on top of the middle layer.
- Add the last layer of cake with the bottom-side down so you have smooth top.
- Place remaining frosting on the top of the cake and swirl around pushing it down onto the sides. Use an off-set spatula to guide the frosting.
- Garnish cake with nuts or other simple components of the filling such as the candied cherries, shredded coconut or macaroon cookies.
Related Recipes
More vintage cakes
1940’s Cookbooks
Nothing Found
It looks like nothing was found.
Tried this recipe? Leave a comment below!
Follow us on social to see more of our cozy collection curated for nostalgic bakers who love looking at vintage cookbooks, original vintage recipes, and retro magazine clippings.
This post may contain affiliate links. As an Amazon Associate, I recommend products I like to use or suggest and may receive a small commission at no cost to you. Please see my full disclosure for more details.
This post includes original cookbook images and text excerpts shared for educational and historical purposes. All rights belong to the original publisher.
Any commentary, notes, or recipe adaptations are my own and reflect my professional baking experience in a commercial kitchen. I am not a licensed medical professional or dietician and do not provide medical or dietary advice.
All modern recipe adaptations and photography © 2025 Vintage Baked Modern LLC. Please do not copy or reproduce without permission.
hi what cookbook is this from I’m asking because I had a cookbook when I was younger that had these recipes I’m looking to replace the cookbook